m (1 revision imported) |
No edit summary |
||
| Line 2: | Line 2: | ||
{{Hint|file=icon_required.png|text= | {{Hint|file=icon_required.png|text=The .NET Framework 3.5 is required by some of the applications that will be installed in the following chpaters. The steps listed here are mandatory.}} | ||
{{Hint|file=hint.png|text= | {{Hint|file=hint.png|text=The .NET Framework setup may fail if your server is in a domain and accessing a WSUS.<br /><br />One solution would be to temporarily take the server out of the domain for this part of the Setup or [http://woshub.com/how-to-install-net-framework-3-5-on-windows-server-2016/ follow the documentation steps from this external source].}} | ||
== | ==Open the Server Manager and the roles Manager== | ||
'''Open''' the Server Manager. Unless otherwise configured, it automatically starts when you log on to the server. You can also find it in the start menu with the search term "Server Manager". | |||
[[File:Setup:systempreparation_net_framework_01.png|border|center|400px|.NET Framework 3.5 01]] | You are now looking at the following view: [[File:Setup:systempreparation_net_framework_01.png|border|center|400px|.NET Framework 3.5 01|link=Special:FilePath/Setup:systempreparation_net_framework_01.png]] | ||
'''Click''' "Manage" (1) in the top toolbar and then '''click''' "Add Roles and Features" (2) in the context menu: | |||
[[File:Setup:systempreparation_net_framework_02.png|border|center|400px|.NET Framework 3.5 02]] | [[File:Setup:systempreparation_net_framework_02.png|border|center|400px|.NET Framework 3.5 02|link=Special:FilePath/Setup:systempreparation_net_framework_02.png]] | ||
==Installation | ==Installation of the framework in the Roles Manager== | ||
You are now in the Roles Manager (Window "Ad Roles and Features Wizard"). | |||
'''Click''' "Next >" multiple times until you haver reached the section "Features" (1) . | |||
'''Activate''' the checkbox ".NET Framework 3.5-Funktionen" (2). After that, proceed to the next step (3): | |||
[[File:Setup:systempreparation_net_framework_03.png|border|center|400px|.NET Framework 3.5 03|link=Special:FilePath/Setup:systempreparation_net_framework_03.png]] | |||
'''Activate''' the checkbox "Restart the destination server automatically if required" (1) and '''click''' "Install" (2): | |||
[[File:Setup:systempreparation_net_framework_04.png|border|center|400px|.NET Framework 3.5 04|link=Special:FilePath/Setup:systempreparation_net_framework_04.png]] | |||
'''Click''' "Close" to finish the installation of the .net Framwork: | |||
== | [[File:Setup:systempreparation_net_framework_05.png|border|center|400px|.NET Framework 3.5 05|link=Special:FilePath/Setup:systempreparation_net_framework_05.png]] | ||
==Next step== | |||
<span style="color: rgb(37, 37, 37)">If you have successfully completed all of the above steps, proceed to the next step:</span> [[Setup:Installation_Guide/System_Preparation/Windows/IIS-Webserver|IIS-Webserver]]. | |||
Revision as of 11:16, 9 March 2022
| The .NET Framework 3.5 is required by some of the applications that will be installed in the following chpaters. The steps listed here are mandatory. |
 |
The .NET Framework setup may fail if your server is in a domain and accessing a WSUS. One solution would be to temporarily take the server out of the domain for this part of the Setup or follow the documentation steps from this external source. |
Open the Server Manager and the roles Manager
Open the Server Manager. Unless otherwise configured, it automatically starts when you log on to the server. You can also find it in the start menu with the search term "Server Manager".
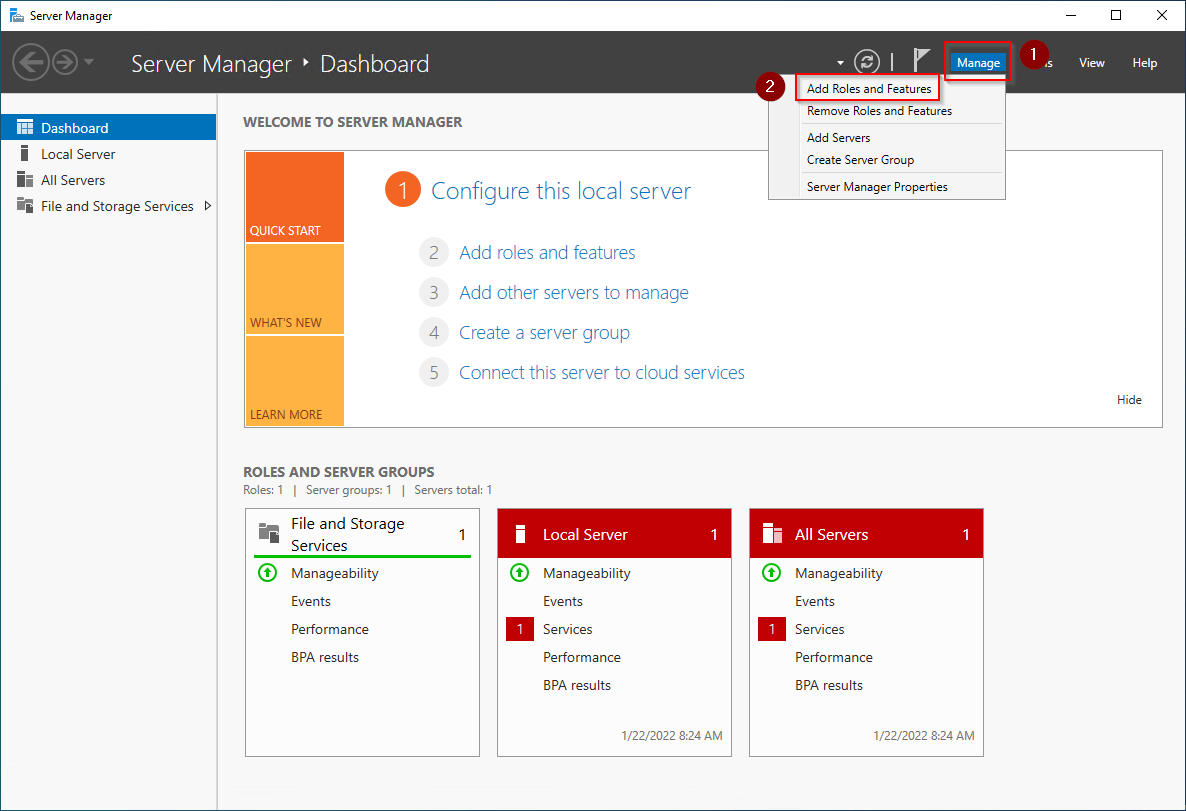
You are now looking at the following view:

Click "Manage" (1) in the top toolbar and then click "Add Roles and Features" (2) in the context menu:
Installation of the framework in the Roles Manager
You are now in the Roles Manager (Window "Ad Roles and Features Wizard").
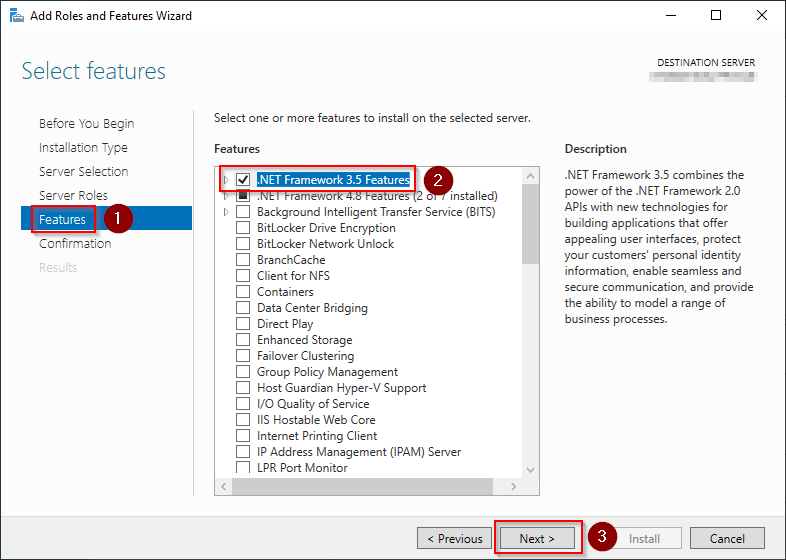
Click "Next >" multiple times until you haver reached the section "Features" (1) .
Activate the checkbox ".NET Framework 3.5-Funktionen" (2). After that, proceed to the next step (3):
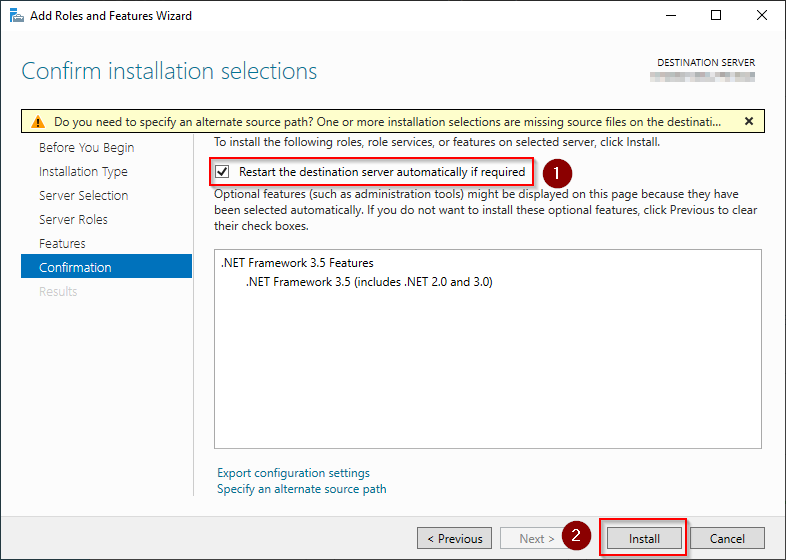
Activate the checkbox "Restart the destination server automatically if required" (1) and click "Install" (2):
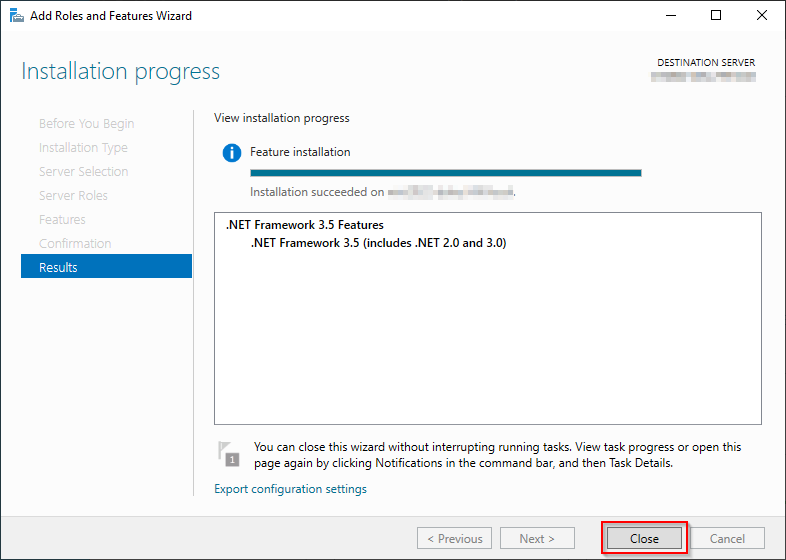
Click "Close" to finish the installation of the .net Framwork:
Next step
If you have successfully completed all of the above steps, proceed to the next step: IIS-Webserver.