Before you import a Word document, you can check the document for its complexity. During the import, the following elements are transferred to the wiki and converted into wikitext:
Document title:
The document should only contain one title. If several titles exist, error messages will be displayed in the wiki in the appropriate places.
Text:
Text formatting is removed and converted to unformatted continuous text. Some text formatting such as bold or italics is applied.
Text boxes are converted to unformatted continuous text.
Headings:
The document should contain correct heading levels if the document is to be converted into several subpages in the wiki.
Images:
Images are imported into the wiki. The images are labelled as Wiki-page-name_image_<consecutive number> .
Overlays on images are not imported into the wiki.
Image names are inserted below the image. Consecutive numbering of the images cannot be continued in the wiki.
All images are inserted centred as "thumbnail" by default.
Note:
When uploading images, the system does not check whether the image already exists in the wiki.
ClickNew > Import Word file in the top menu. Import menu
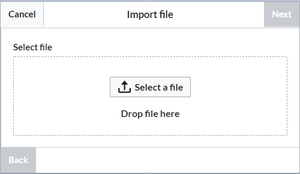
ClickSelect a file or drag the Word file in the drop zone.Upload dialog
ClickNext.
Choose the import settings you want.Settings
Title:The title of the wiki page generated by the import. When the content structure is broken up, the chapters are created as sub-pages of this main page.
Content structure: If the "Split content to pages" checkbox is activated, subpages are created from the heading levels of the Word document. This is possible up to 3 levels deep.
Conflicts with page title:
Rename: The imported page is created as <page name> (1). However, this should be avoided, especially with large Word files that are divided into additional levels. It is best to enter a new page title here as an alternative. A naming conflict is displayed in the preview. In this case, if necessary, click Cancel to start the import with a new title. Or select "Override" as a conflict resolution.
Override: The existing page(s) will be overwritten with a new version.
ClickNext. The preview shows: (1) the names of the pages that will be created (2) via the arrow icon: the files that will be imported for the individual pages (3) via the eye icon: the content of the individual wiki pages.
ClickImport. After the import is complete, the created pages are displayed as a page collection in the wiki. You can view the pages from this page by clicking on the link.
Note:In a wiki installed with "English" as the content language (contentlanguage), the path to the page starts with MediaWiki:Page collection.
Since the display titles of the book pages show the path of the imported subpages, it makes sense to edit the display titles afterwards. To do this, open the book page in source edit mode and remove the path with the trailing "/".
Changing the chapter titles
If the book has a lot of pages, you can copy the source code into an editor like Notepad++ and replace the following text:
|Employee handbook/
Replace the text and take care that the vertical pipe after the actual page name and before the page title is the replacement text.
|
Copy the source code back to the wiki and save the book page.
Images have a background/shadow and only the background/shadow is imported: These images are not supported. Solution: Remove the background/shadow before the import.
Images are embedded as .tmp files in the Word document for an unknown reason. Solution: Before importing, save the images from the Word document locally and then use them to replace the original image in the Word document.
The display title sets a page title that is different from the page name.
It becomes the preferred page label used in many automatically generated page lists. It can be changed with the visual editor (Options > Advanced settings). The source of the wiki page shows the magic word {{DISPLAYTITLE:My display title}}.